How To Install Barrier Arms For Linear Automatic Barrier Gate Openers
There are two types of barrier arms for Linear Automatic Barrier Gate Openers: the standard barrier arm and the wishbone style arm. Both have four parts: the gate arm flange, the cutting edge plate, the hardware, and the gate arm. Though the wishbone style arm has a few more parts, it is also easy to assemble. The barrier gate arm(s) connects to the operator with the gate arm flange(s). The cutting edge plate(s) protects the operator from damage if a vehicle runs into the arm by shearing off the gate arm to minimize damage to the operator. The hardware secures the connections, and the gate arm itself is the barrier.
How To Attach A Standard Barrier Arm
Step 1: Gate Arm Flange Assembly
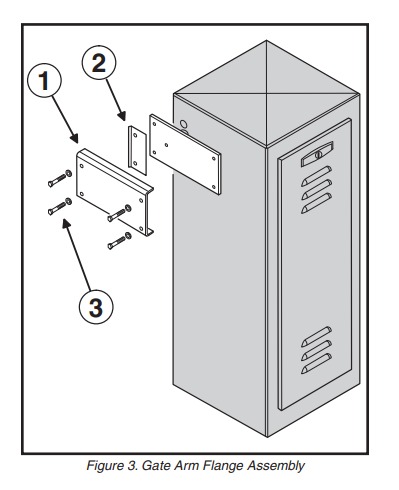
As Shown in Figure 3. Gate Arm Flange Assembly
Line up the pre-drilled holes on the gate arm channel (1) and the gate arm flange (2) and attach them with the hardware provided (3). Do not tighten the bolts completely at this point.
Step 2: Attaching The Gate Arm
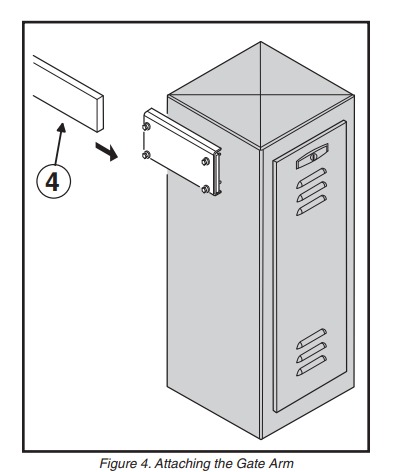
As Shown in Figure 4. Attaching The Gate Arm
Slide the gate arm (4) through the opening in the gate flange assembly. There should be enough clearance to slide the gate arm between the bolts into position. Then, tighten the bolts, securing the entire gate arm assembly.
How To Attach A Wishbone Style Arm (For SG Series Gate Openers)
Step 1: Gate Arm Flange Assembly
As Shown above in Figure 3. Gate Arm Flange Assembly
Line up the pre-drilled holes on the gate arm channel (1) and the gate arm flange (2) and attach them with the hardware provided (3). Do not tighten the bolts completely at this point.
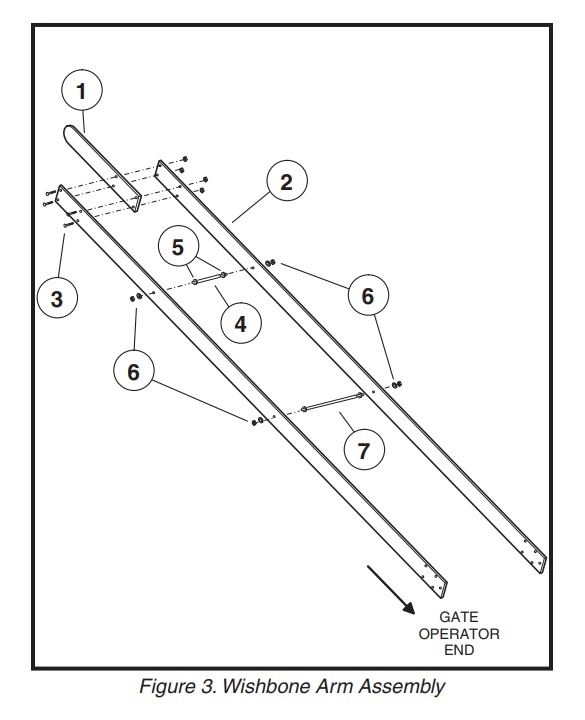
Step 2: Wishbone Arm Assembly
As Shown in Figure 3. Wishbone Arm Assembly
Lay out the parts on the ground. Assemble as shown: attach the gate arms (2) with the spreader arms (4 & 7) and loosely attach all other parts and hardware. Make sure to leave all fasteners loose for now.
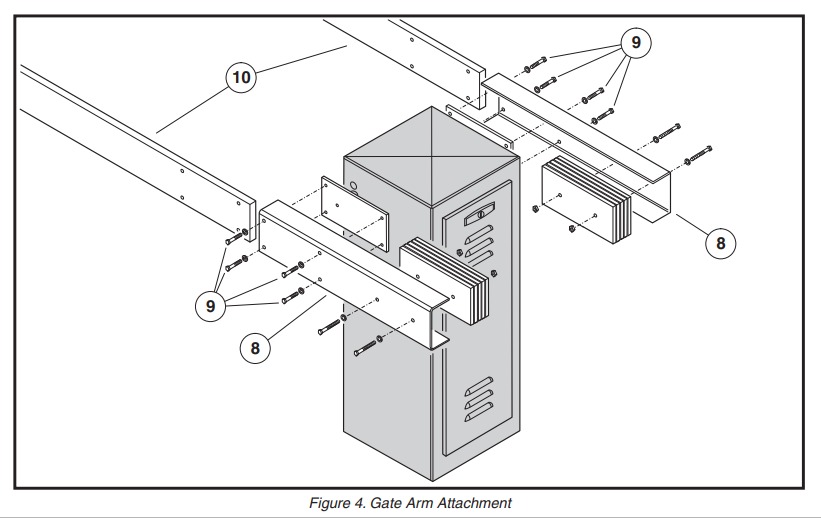
Step 3: Gate Arm Attachment
As Shown in Figure 4. Gate Arm Attachment
With the assistance of at least 1 other person, lift the arm even with the height of the arm flange on the opener. Slide into the flange channels, as shown in Figure 4. Gate Arm Attachment. Tighten bolts pictured as 9, then 3, then 6.
The arm should have a curved, wishbone appearance once attached.
If you need more installation or assembly information for your barrier gate opener or any of its components, installation manuals, specification sheets, and warranty information for all gate openers are attached in each product description for your convenience. Or you can visit our Resources tab and the page for Linear Nortek Operating Manuals and Specification Sheets, which is also linked below.
Find Manuals & More